Our Blog
How to Remove Popcorn Textured Ceilings
In the past, popcorn ceilings were a widely popular trend for a couple of reasons. Contractors found that it was an easy way of covering up imperfections in the ceiling. It also saved time on completing a new construction because the ceiling’s finish wouldn’t have to be smoothed out to perfection. Unfortunately, this trend hasn’t aged well, and many modern home buyers want to get rid of their popcorn ceilings. The following guide can help you.
Test a Small Area
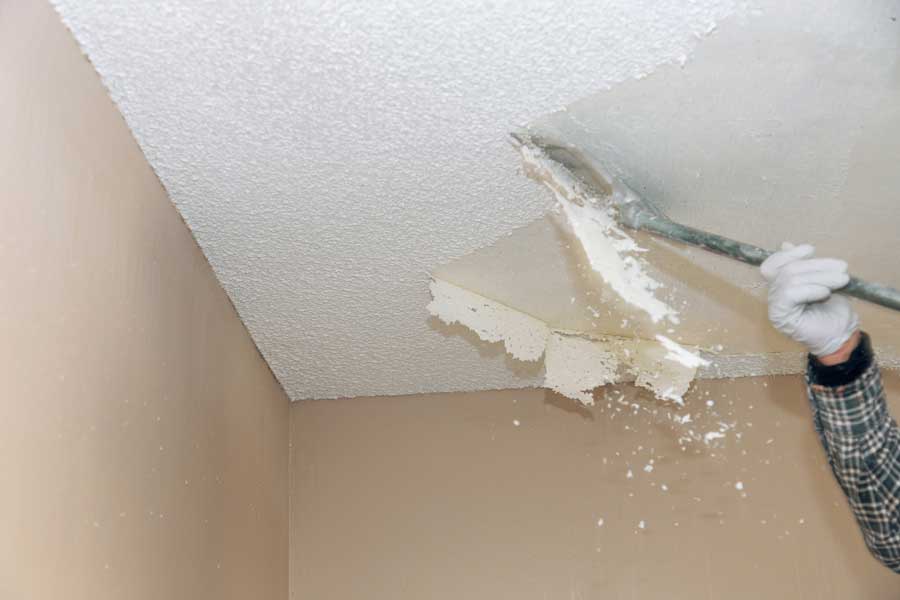
In most cases, older popcorn ceilings can be easily removed by using a paint scraper and a little elbow grease. Use the scraper to try to remove a small area. If the popcorn isn’t coming off, you’ll have to try spraying the area with lukewarm water before scraping it. The moisture should make it easier to scrape the popcorn off of the ceiling. If the popcorn still seems resistant, it’s likely that the original contractor painted the ceiling before adding the popcorn texture. In this situation, you’ll be faced with a more labor-intensive process, so you may not want to proceed.
If you do decide to proceed with removing the popcorn texture, your next step should be to schedule asbestos testing for your home. Scraping the popcorn off in a home that was built with asbestos will release that hazardous compound into your home’s environment. Asbestos is widely known as a carcinogen that causes lung cancer, so it’s better to keep that material concealed. Consider adding an extra layer of protection by using drywall or wood paneling to cover the ceiling.
Preparing For the Project
There are a few steps to take in preparing for this project and doing so can help you avoid a messy cleanup project later. To begin, you should remove all the furniture from the room. If you can’t remove furnishings, they will have to be wrapped in plastic sheeting to prevent them from being damaged. Similarly, you should cover the walls, windows, and flooring in plastic sheeting. The final step in protecting your home is to remove ceiling fans. Once the fans have been removed, wrap exposed wires in plastic to protect them from getting wet. Similarly, light switches and electrical outlets should be protected with plastic wrap. This will help guard against shorts caused by your home’s electrical wiring.
Now that you’re ready to begin, determine if you’ll need to wet the popcorn ceiling before scraping. If so, spray it lightly by using a garden hose. Once the entire ceiling is damp, let the water sink in for about 15 minutes.
Scraping Away the Popcorn
As you begin scraping off small sections of the ceiling at a time, keep a mud pan with you. This will help you catch drippings that may come from the wet ceiling, and it will give you someplace to scrape residue off your scraper. You should also keep the hose nearby so you can dampen the ceiling as you go. Since the ceiling will dry over time, wetting your work area may be necessary.​
Once the popcorn has been completely removed, you should sand your ceiling. This will help remove any excess residue and it will help smooth out imperfections in the ceiling. Wipe the ceiling with a damp cloth and wait for it to completely dry before you add the first coat of paint.
While this is a labor-intensive project, getting it done will leave you with a ceiling that will fill you with pride. More importantly, it will increase the value of your home.
When you want to build your dream home, KCI Homes can help. See samples of our work by visiting our gallery page!
By KCI Homes 11-17-2021
Recent:
Categories
Archive
Jun 2025
May 2025
Apr 2025
Mar 2025
Feb 2025
Jan 2025
Dec 2024
Nov 2024
Oct 2024
Sep 2024
Aug 2024
Jul 2024
Jun 2024
May 2024
Apr 2024
Mar 2024
Feb 2024
Jan 2024
Dec 2023
Nov 2023
Oct 2023
Sep 2023
Aug 2023
Jul 2023
Jun 2023
May 2023
Apr 2023
Mar 2023
Feb 2023
Jan 2023
Dec 2022
Nov 2022
Oct 2022
Sep 2022
Aug 2022
Jul 2022
Jun 2022
May 2022
Apr 2022
Mar 2022
Feb 2022
Jan 2022
Dec 2021
Nov 2021
Oct 2021
Sep 2021
Aug 2021
Jul 2021
Jun 2021
May 2021
Apr 2021
Mar 2021
Feb 2021
Jan 2021
Dec 2020
Nov 2020
Oct 2020
Sep 2020
Aug 2020
Jul 2020
Jun 2020
May 2020
Apr 2020
Mar 2020
Feb 2020
Jan 2020
Dec 2019
Oct 2019
Sep 2019
Aug 2019
Jul 2019
May 2019
Mar 2019
Jan 2019
Oct 2018
Jul 2018
Apr 2018
Dec 2017
Nov 2017
Oct 2017
Aug 2017
Jun 2017
Mar 2017

